I host few services on my Unraid server, including this blog. Until now, a combination of DuckDNS and port forwarding 443 to Nginx Proxy Manager has been enough to access these services when away from home. But after switching to Starlink in my new home, I discovered this setup could not work with CGNAT.
So I looked at alternatives like VPNs, Tailscale and tunneling from a VPS, but it all seemed a lot of work with technology I was only vaguely familiar with. Surely there had to be an easier way. It turns out there is... Cloudflare tunnels. Here's how I set it up.
Requirements
- A free Cloudflare account
- Your own domain name (can be purchased through Cloudflare)
- A machine that is always on
Step 1 - Cloudflare Domain
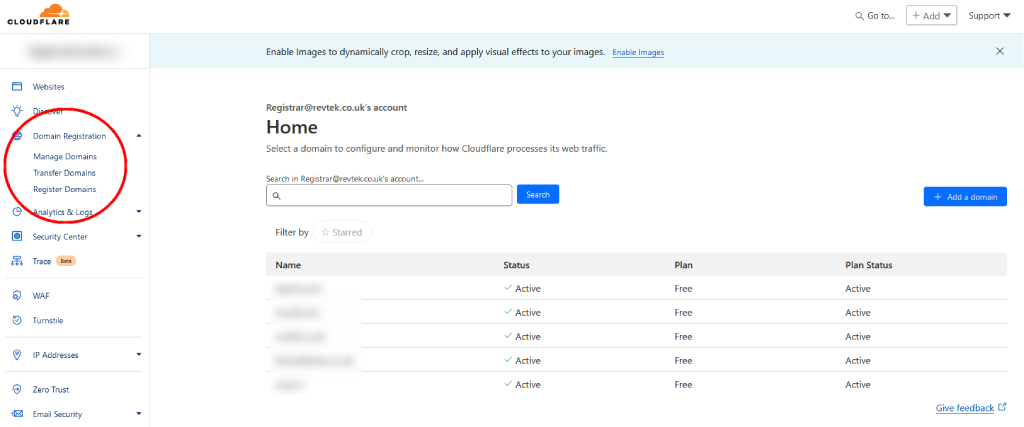
Head over to https://www.cloudflare.com/ and sign-up or log into an existing account. Your domain records (DNS) need to be managed by Cloudflare, so navigate to Domain Registration and Register, Transfer or Manage your domain as applicable. Check their support page if you get stuck.
Step 2 - Create a Cloudflare Zero Trust
You must create a Zero Trust team to set up the Cloudflare tunnel. Head back to the Cloudflare Dashboard and navigate to Zero Trust. Follow the prompts to create a Zero Trust teams account. Your user will automatically be added to the team. Cloudflare Zero Trust is a free service for up to 50 users, and you won't need to add any other users to the team, unless your enabling advanced security features.
Step 3 - Create a Cloudflare Tunnel
This is where we need a machine at home that is always on. This machine will run the tunnel connector that connects external requests to internal services on your network. So this machine needs to be able to access the services on your internal network. The connector can be deployed on Windows, Mac, Linux or Docker. I've seen examples of it running on Raspberry Pi too. In my case, I create up a very simple Debian VM on my Unraid server. Just 2G memory and 5G HDD (for logging). Stick with whatever OS you're most comfortable with.
[!TIP] You can now deploy an Unraid-Cloudflared-Tunnel docker container in Unraid and skip the requirement for a VM or seperate OS. All you'll need is the tunnel token ID.
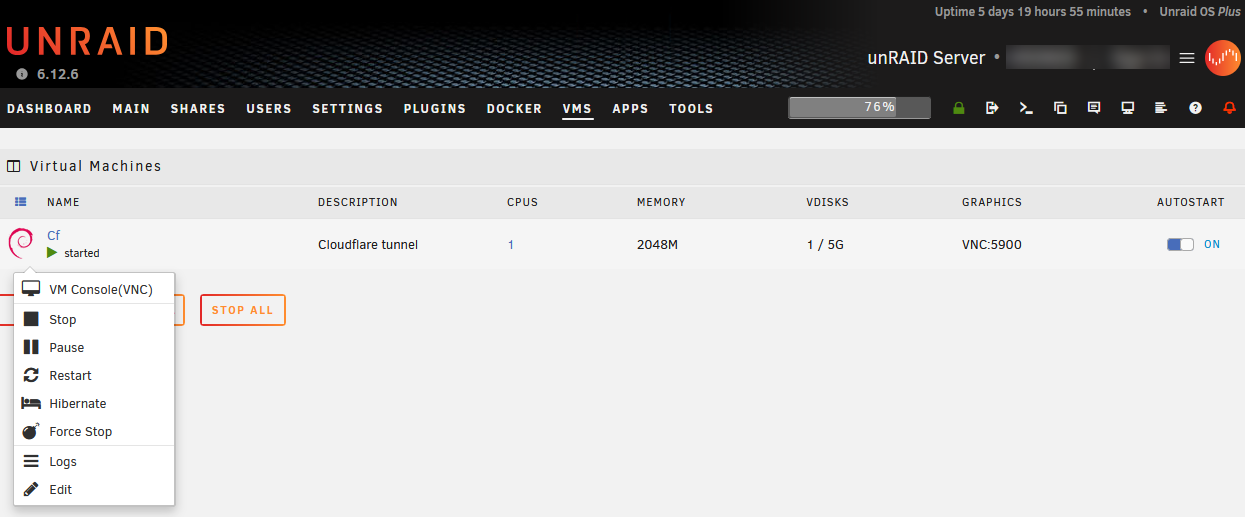
When the machine is up and running go back to the Cloudflare Zero Trust dashboard and click Networks > Tunnels. We will create a Cloudflared tunnel, name it and then follow the instructions to install the connector on our local machine.
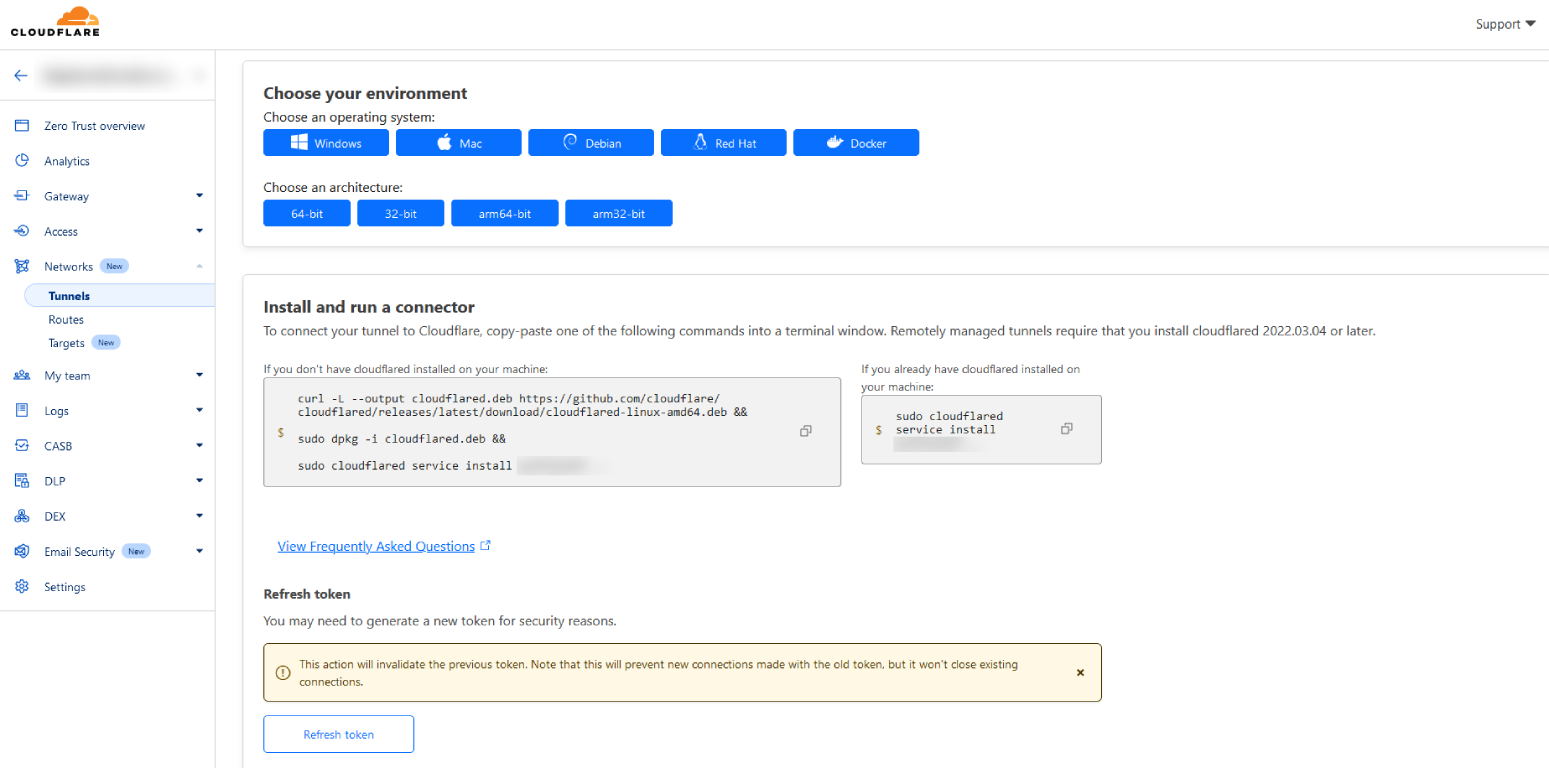
If you go back to the Tunnels dashboard, you will see your new Cloudflare tunnel is now active.

Step 4 - Define my Applications
The last step is defining the applications I want accessible remotely. I also used Cloudflare to assign access controls that restrict access to authorised users, but this tutorial only covers the publicly accessible apps. What I'm doing here is effectively replicating my Nginx Proxy Manager setup in Cloudflare. In my example, I'm setting up access to Immich, my personal photo manager.
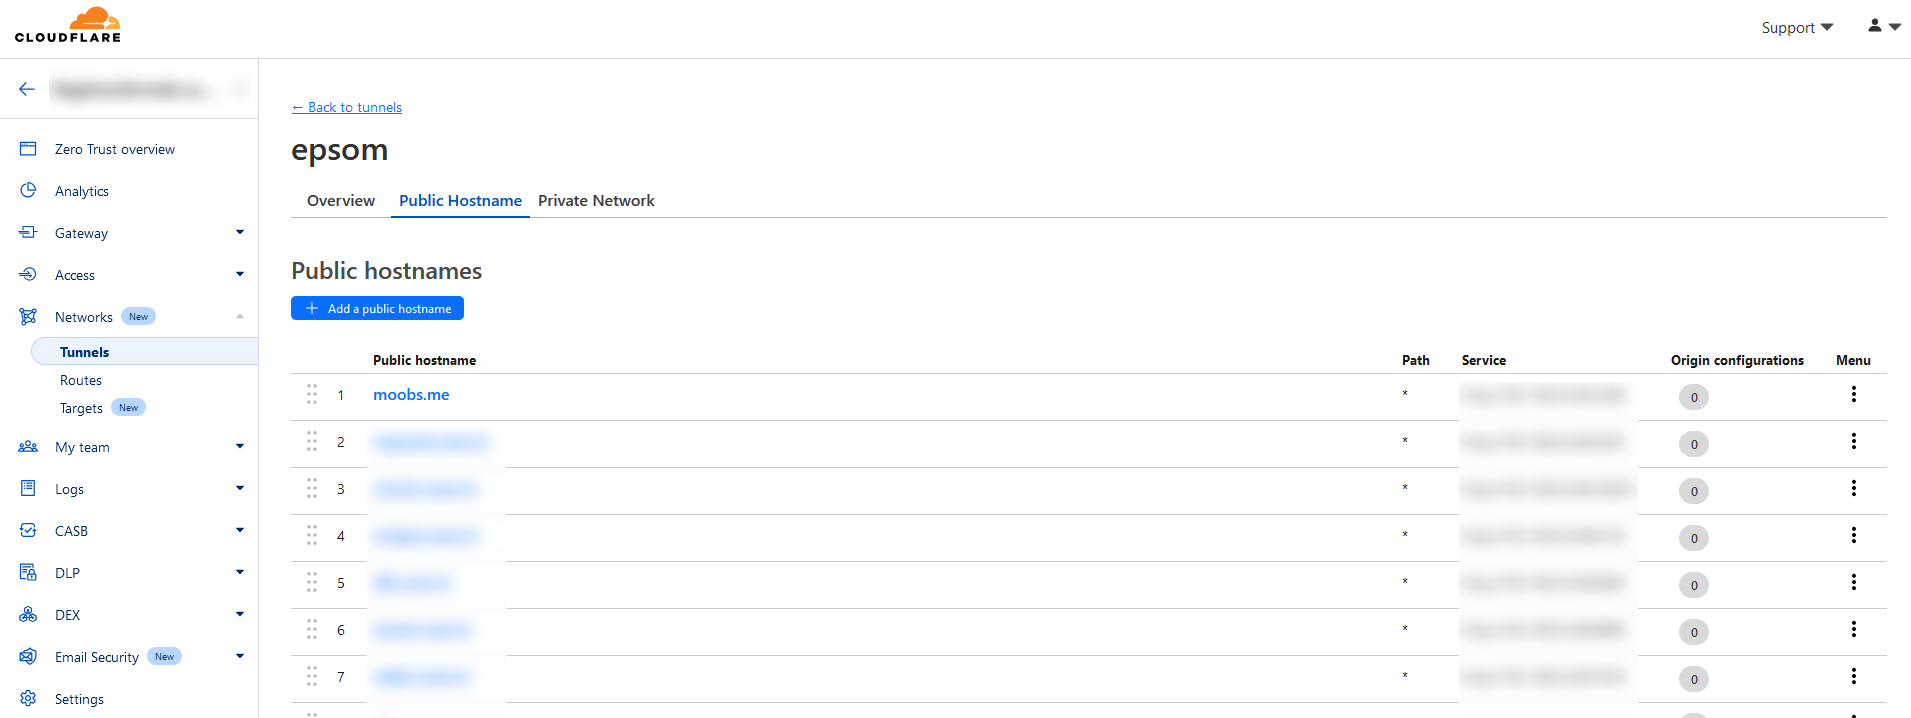
- In the Cloudflare Zero Trust tunnels, click the name of the new tunnel you just created, and click Edit. Go to the Public Hostname tab and click add a public hostname.
- Define the public hostname (in my example, I am setting up https://photos.moobs.me to access my app).
- Define the service. This is the network address your local Cloudflare machine will access the application from.
- Save the hostname.
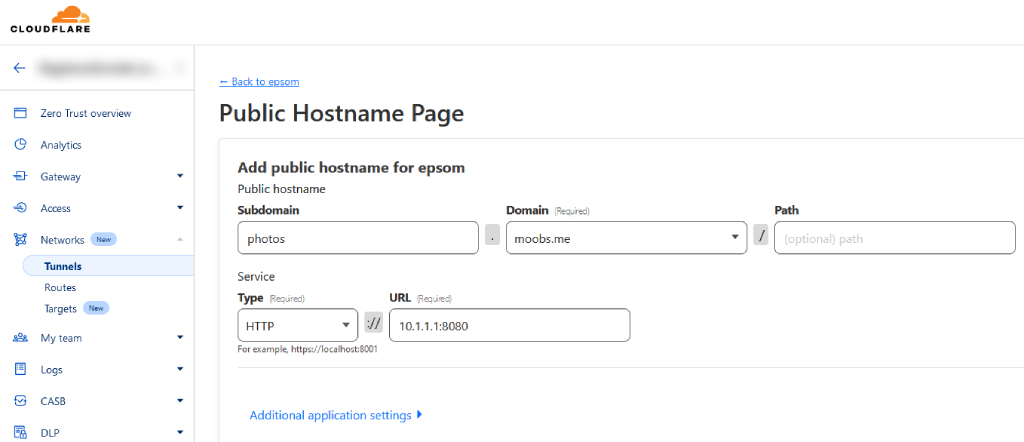
You can test the link and, if it was set up correctly, it should work straight away. That's all there is to it. Rinse and repeat for all of your other applications and say goodbye to your CGNAT port mapping woes.
